General testing method for high-speed motors
2022-9-9
Generally, the circular runout of the high-speed motor includes three items: (1) the circular runout of the motor shaft extension to the motor axis or the rotation axis; (2) the circular runout of the collector ring surface of the wound rotor motor to the motor axis or the rotation axis; (3) The seam of the flange end cover and its flange mating surface should be checked to see if the radial runout meets the requirements. beat.

High-speed motor shaft extension and collector ring radial runout detection
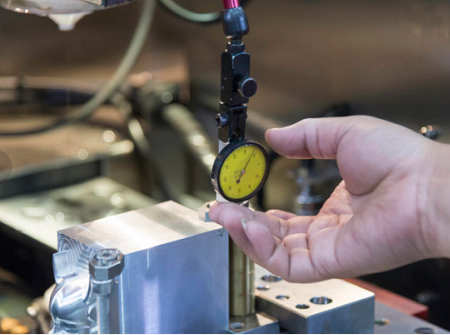
A lever dial indicator with a magnetic base or a height gauge with a lever dial indicator can be used. From the actual detection experience, the lever dial indicator with magnetic base is more convenient. In this paper, a lever dial indicator with a magnetic base is used as a measuring instrument as an example to briefly describe its measuring method.
● Adsorb the magnetic base of the dial indicator on the iron platform or motor end cover close to the measured point. During the adsorption process, ensure its firmness to prevent the measuring tool from being damaged due to unreliable adsorption.
● Adjust the rod of the dial indicator so that the head of the measuring rod touches the point to be measured. For shaft extensions and slip rings, the measuring point shall be at the midpoint of their axial length or width.
● After adding a certain pressure to the dial indicator, tighten the screws at each turning point, and zero the dial indicator (that is, align the 0 position of the bezel with the pointer).
● Rotate the shaft of the cutting motor or high-speed motor slowly for one circle (the keyway should be avoided for the detection of shaft extension, so as not to damage the gauge head), and record the maximum swing range of the gauge pointer. The above swing range value is the radial circular runout value of the measured shaft extension or collector ring. For example, if the pointer swings between +0.01mm and -0.02mm, the swing range is 0.03mm, that is to say, the radial circular runout value is 0.03mm.
Measurement of the radial and axial runout of the flange end cover seam to the axis
● Placement of spindle cutting motor. When measuring, the dial gauge frame can be fixed on the shaft extension through its magnetic base. However, there is a problem that needs to be paid attention to. Due to the existence of the radial clearance of the bearings used, if the motor under test is placed horizontally during measurement, the rotor will sink under the action of its gravity, causing its axis to deviate from the center position. (Theoretical deviation is half of the radial clearance of the bearing used), resulting in errors in the method of measurement, which brings certain difficulties to the judgment of the final result, and even leads to misjudgment. The more accepted placement method is to put the flanged end cover of the motor under test upwards so that the axis of the motor is perpendicular to the ground.
● Measurement method. Install the dial gauge with grade 1 precision on the magnetic gauge stand. The magnetic meter base is sucked on the shaft extension (to ensure that the adsorption is firm).
(1) The method of measuring the radial circular runout of the flange end cover seam to the motor axis. Put the measuring head of the dial gauge against the side of the flange end cap stop, adjust the position of the dial gauge and the measuring force, fix it in one position, and adjust the gauge cover so that the pointer points to the zero position. Rotate the rotating shaft slowly by hand for one circle, and record the maximum and minimum values indicated by the dial indicator. The difference between the two values (that is, the swing range of the pointer) is the value of the radial circular runout of the flange end cover seam to the motor axis.
(2) The measurement method of the circular runout of the flange end cover seam to the end face of the cutting motor axis. The method of measuring the circular runout of the flange end cover seam to the high-speed motor axis end face is basically the same as the method of measuring the radial direction, the only difference is that the probe of the dial indicator should be placed on the end face of the seam.


